Imagine biting into a juicy, sweet papaya you grew yourself, right on your patio. Sounds like a tropical dream, doesn't it? Well, it's more achievable than you think! With a little know-how, you can successfully grow papaya trees in pots , even if you don't live in a tropical paradise. Let's dive in and discover the secrets to nurturing your own potted papaya tree. Why Grow Papaya Trees in Pots? Growing papaya trees in containers, rather than directly in the ground, offers several advantages. First and foremost, it allows you to control the environment. Papayas thrive in warm temperatures and are sensitive to frost. By growing them in pots, you can easily move them indoors when the weather turns chilly. This is particularly beneficial for those of us living outside of tropical zones. Container growing also simplifies pest control. Keeping your papaya tree in a pot reduces its exposure to soil-borne pests and diseases. And because the tree is...
Ever dreamed of having your own papaya orchard right in your backyard? Imagine the sweet, juicy taste of homegrown papaya, a tropical delight you can enjoy whenever you please. The journey to that backyard paradise begins with understanding the fascinating world of papaya propagation. Let's explore the different ways you can bring these delicious fruits into your life.
Understanding Papaya Propagation
Papaya, scientifically known as Carica papaya, is a fast-growing, short-lived perennial plant often cultivated as an annual. It's prized for its sweet fruit and medicinal properties. Understanding how to propagate papayas effectively is crucial for both home gardeners and commercial growers. The success of your papaya venture depends on selecting the right propagation method and providing optimal conditions for growth. Propagation refers to the process of creating new plants from existing ones, and for papayas, this is primarily achieved through seeds or vegetative methods.
Seed Propagation of Papaya
Seed propagation is the most common and widely used method for growing papayas. It's a relatively simple and cost-effective way to produce a large number of plants. However, keep in mind that papayas are dioecious, meaning they have separate male and female plants. Therefore, seed propagation can lead to some variability in the offspring. This means you might end up with some male plants that don't produce fruit.
Selecting and Preparing Papaya Seeds
The first step in successful seed propagation is choosing the right seeds. Here's what to look for:
- Source: Obtain seeds from a reputable source. Farmers markets or local nurseries often have seeds from high-quality, known varieties.
- Fruit Type: Choose seeds from hermaphrodite (self-pollinating) or female fruits that are known for good fruit quality. These plants have a higher chance of producing quality fruit themselves.
- Seed Appearance: Select plump, black seeds. Avoid shriveled or pale seeds, as these may not be viable.
- Extraction: Extract seeds from fully ripe fruits. Ferment the seeds for 2-3 days to remove the gelatinous sarcocarp. This fermentation process improves germination rates. After fermentation, wash the seeds thoroughly and dry them in a shaded area.
Fact: Papaya seeds have a relatively short shelf life, so it's best to use them within a few months of extraction.
Sowing Papaya Seeds
Once you have your seeds, it's time to sow them. Here's how to do it:
- Growing Medium: Use a well-draining potting mix. A mixture of peat moss, perlite, and vermiculite works well.
- Seed Trays or Pots: Sow seeds in seed trays or individual pots. Sow 2-3 seeds per pot, about 1/2 inch deep.
- Watering: Water gently to keep the soil moist but not waterlogged.
- Germination: Keep the seed trays or pots in a warm, shaded location. Papaya seeds typically germinate within 1-3 weeks.
Tip: Soaking papaya seeds in water for 24 hours before sowing can improve germination rates.
Transplanting Papaya Seedlings
After germination, select the strongest seedling in each pot and remove the others. Once the seedlings have developed 4-6 true leaves, they're ready to be transplanted into larger containers or directly into the ground. Here's what to consider:
- Location: Choose a sunny location with well-draining soil. Papayas need at least 6-8 hours of sunlight per day.
- Soil Preparation: Amend the soil with compost or other organic matter to improve fertility and drainage.
- Planting: Dig a hole that's twice as wide and as deep as the root ball. Gently remove the seedling from its container and place it in the hole. Backfill with soil and water thoroughly.
- Spacing: Space papaya plants 6-10 feet apart, depending on the variety.
Important Note: Because papayas are dioecious, you'll need to plant several seedlings to ensure you get at least one female plant. Some modern varieties are gynodioecious, meaning they have both female and hermaphrodite plants, which increases your chances of getting fruit-producing plants.
Vegetative Propagation of Papaya
While seed propagation is the most common method, vegetative propagation offers the advantage of producing plants that are genetically identical to the parent plant. This means you can be sure you're getting plants with the desired fruit quality and characteristics. However, vegetative propagation of papayas can be challenging and is not as widely practiced as seed propagation.
Air Layering of Papaya
Air layering, also known as marcotting, is a method of propagating plants by rooting a branch while it's still attached to the parent plant. This method can be used for papayas, but it requires patience and skill. Here's how to do it:
- Select a Branch: Choose a healthy, mature branch on the parent plant.
- Prepare the Branch: Remove a ring of bark (about 1 inch wide) from the branch.
- Apply Rooting Hormone: Apply rooting hormone to the exposed area.
- Wrap with Sphagnum Moss: Wrap the area with moist sphagnum moss.
- Cover with Plastic: Cover the sphagnum moss with plastic wrap and secure it with tape or string. This will help retain moisture.
- Wait for Roots: Check the air layer periodically for root development. This can take several weeks or months.
- Cut and Plant: Once roots have formed, cut the branch below the air layer and plant it in a pot or directly into the ground.
Benefit: Air layering ensures that the new plant retains the desirable traits of the parent plant, such as fruit size, taste, and disease resistance.
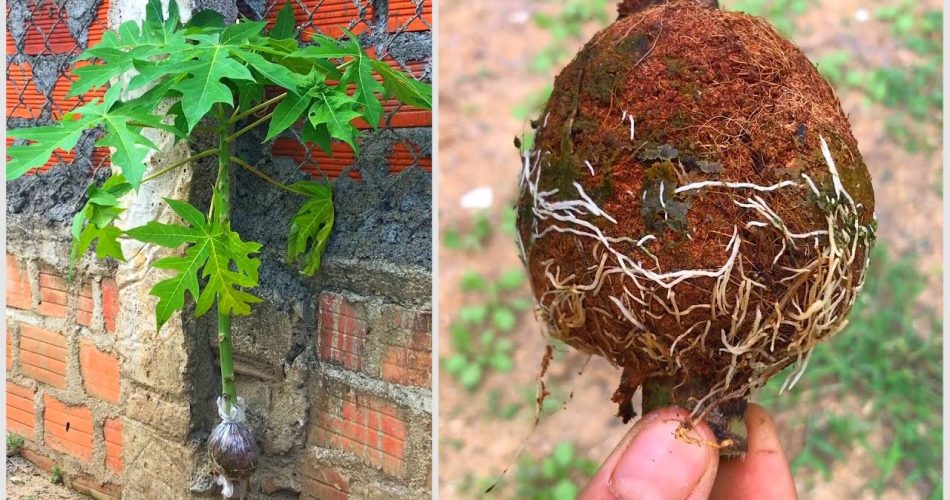
Stem Cuttings for Papaya Propagation
Stem cuttings are another vegetative propagation method that can be used for papayas. However, it's not as reliable as air layering. Here's the process:
- Select a Cutting: Choose a healthy stem cutting from a mature papaya plant. The cutting should be about 6-8 inches long.
- Prepare the Cutting: Remove the lower leaves from the cutting.
- Apply Rooting Hormone: Dip the cut end of the stem in rooting hormone.
- Plant the Cutting: Plant the cutting in a well-draining potting mix.
- Water and Cover: Water the cutting gently and cover it with a plastic bag or dome to maintain humidity.
- Wait for Roots: Keep the cutting in a warm, shaded location and wait for roots to develop. This can take several weeks.
Challenge: Rooting papaya stem cuttings can be difficult, and success rates are often low.
Grafting Papayas
Grafting involves joining two plants together so they grow as one. This method can be used to propagate papayas, but it requires specialized skills and equipment. Typically, a scion (the top part of the plant) from a desirable papaya variety is grafted onto a rootstock (the bottom part of the plant) from a hardy or disease-resistant variety. Here's a simplified overview:
- Select Scion and Rootstock: Choose a healthy scion and rootstock that are compatible.
- Prepare the Graft: Make a clean cut on both the scion and rootstock.
- Join the Graft: Join the scion and rootstock together securely.
- Wrap the Graft: Wrap the graft union with grafting tape or wax to protect it and keep it moist.
- Wait for Union: Keep the grafted plant in a protected environment until the graft union has healed.
Maintaining a garden can be tough on your knees and back! For a comfortable gardening experience, consider theKVR Upgraded Garden Kneeler and Seat with Thicken & Widen Soft Kneeling Pad, Heavy Duty Foldable Gardener Stool with 2 Tool Pouches, Gardening Gifts for Women Mom Men. This handy tool transforms into both a comfortable kneeler and a sturdy seat, making planting and tending to your papaya plants much easier! You can find this fantastic garden companion here:https://amzn.to/4mhl Mx I.
Optimizing Growing Conditions for Papaya Propagation
Regardless of the propagation method you choose, providing optimal growing conditions is essential for success. Here are some key factors to consider:
Temperature
Papayas thrive in warm temperatures, ideally between 70°F and 90°F (21°C and 32°C). They are sensitive to frost and cold temperatures, which can damage or kill the plants. If you live in an area with cold winters, consider growing papayas in containers so you can move them indoors during the cold months.
Sunlight
Papayas need plenty of sunlight, at least 6-8 hours per day. Choose a location that receives full sun for best results. If you're growing papayas indoors, provide supplemental lighting with grow lights.
Watering
Papayas need regular watering, especially during dry periods. Keep the soil moist but not waterlogged. Overwatering can lead to root rot, which is a common problem in papayas. Use well-draining soil to prevent this issue.
Soil
Papayas prefer well-draining soil that is rich in organic matter. Amend the soil with compost or other organic matter to improve fertility and drainage. The ideal soil p H for papayas is between 6.0 and
6.5.
Fertilizing
Papayas are heavy feeders and require regular fertilization. Use a balanced fertilizer that is high in nitrogen, phosphorus, and potassium. Apply fertilizer every 2-3 months during the growing season.
Pest and Disease Control
Papayas can be susceptible to various pests and diseases, including aphids, spider mites, whiteflies, and fungal diseases. Monitor your plants regularly for signs of pests or diseases and take action promptly. Use organic pest control methods whenever possible. Ensuring proper air circulation and avoiding overwatering can help prevent fungal diseases.
Troubleshooting Common Papaya Propagation Problems
Even with the best care, you may encounter some problems during papaya propagation. Here are some common issues and how to address them:
Poor Germination
- Issue: Seeds fail to germinate or germination rates are low.
- Possible Causes: Old seeds, poor seed quality, improper soil moisture, low temperatures.
- Solutions: Use fresh seeds from a reputable source. Soak seeds in water for 24 hours before sowing. Maintain proper soil moisture and temperature.
Seedling Damping Off
- Issue: Seedlings suddenly collapse and die.
- Possible Causes: Fungal infection, overwatering, poor air circulation.
- Solutions: Use a sterile potting mix. Avoid overwatering. Provide good air circulation. Treat with a fungicide if necessary.
Slow Growth
- Issue: Seedlings or plants grow slowly.
- Possible Causes: Insufficient sunlight, nutrient deficiencies, poor soil drainage.
- Solutions: Provide adequate sunlight. Fertilize regularly. Improve soil drainage.
Leaf Yellowing
- Issue: Leaves turn yellow.
- Possible Causes: Nutrient deficiencies (especially nitrogen or magnesium), overwatering, root rot.
- Solutions: Fertilize with a balanced fertilizer. Avoid overwatering. Improve soil drainage.